-R(150px).jpg?width=100&height=100&name=Six3_box(red)-R(150px).jpg "logo")
How to Install Six3Tile Kitchen Backsplash Paneling: A Quick Guide
Six3Tile kitchen backsplash paneling is a true game-changer for installers and apartment managers who’ve grown tired of the ceramic tile installation process. It’s a ceramic tile alternative that’s quick and easy to install, requiring only a fraction of the effort and time. To get an idea of what to expect with Six3Tile easy kitchen backsplash kits, read this article all the way to the end. It’ll cover all aspects of a typical kitchen backsplash installation with Six3Tile Backsplash Pro Kits.
Prep Your Installation Area
The first step is to ensure that your installation area is ready for the tile wall panels. To do this, you’ll take the following steps:
- Ensure that your surface is appropriate. The tile panels can be mounted to a few different surface types:
- Drywall
- Moisture-resistant drywall
- Cement backer board
- Existing tile
- The surface doesn’t have to be finish quality. If you’ll be installing the Six3Tile panels over old tile, take a few minutes to clean the existing tile. Mold, mildew, and soap residue could hinder proper tile adhesion.
Plan Out Your Installation
The Six3Tile Backsplash Pro Kit has 5 tile panels and covers a total of 30 square feet. With that information in mind, measure the installation area with the purpose of figuring out just how many panels you’ll need.
Measure, Cut, and Mount the Tile Panels
It’s time to get into how to measure and cut the first tile panel. This panel will act as the foundation of your install. We recommend that you plan on mounting the first panel at the area’s focal point. That may be an end or a corner. To get a picture-perfect professional result, it’s best to create a straight end, mount that first panel, and then work forward, putting up more panels. Follow the below instructions to do so:
- Cut a straight edge on the first tile panel. The panels in this kit are pre-cut in an interlocking pattern for seamless results. But since you’ll need to mount the tile panels to fit a corner or end (to start), you’ll have to create a straight edge. To do this, you’ll use your utility knife to cut off the tabs from one end of a tile panel.
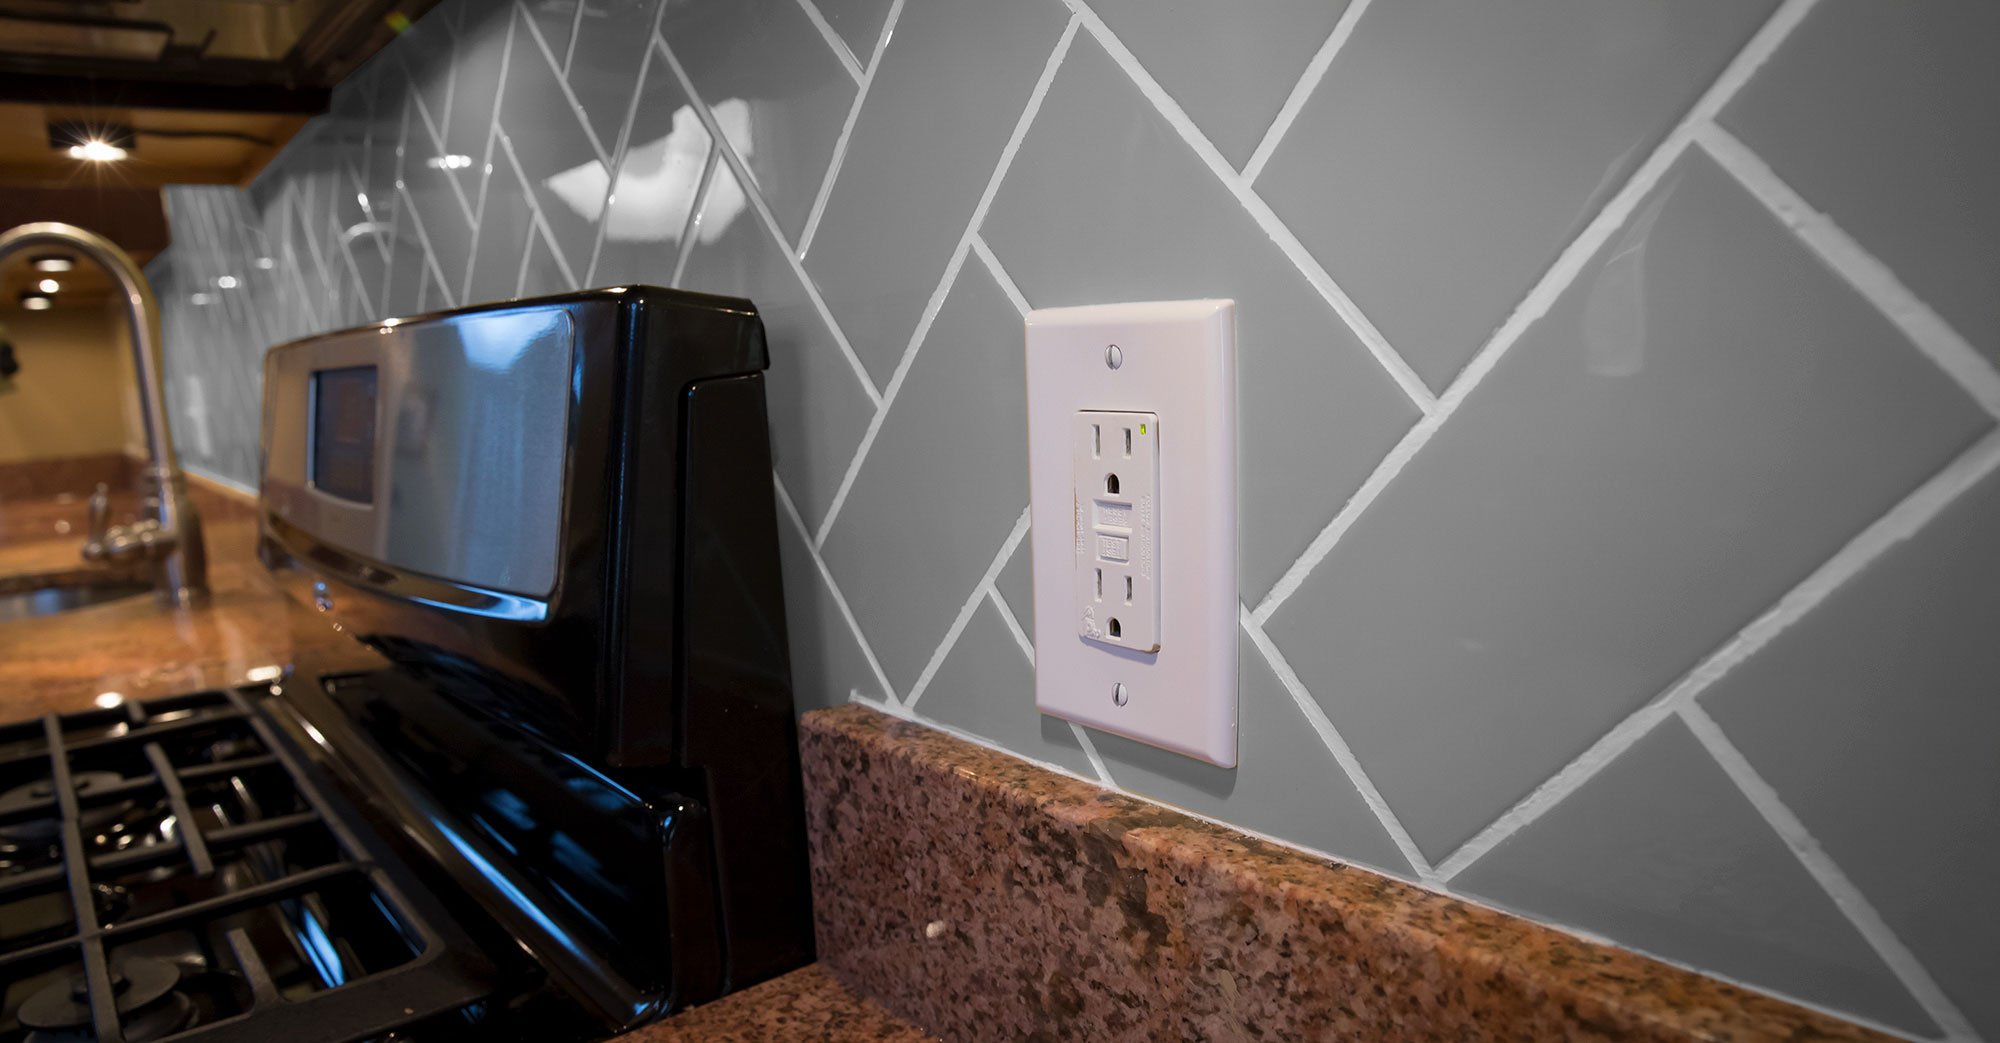
- Measure and make your cutouts for switches, fixtures, and electrical outlets.
- Mount the first tile panel by applying construction adhesive or Type 1- mastic to the back of it and pressing it onto the wall. Now that you’ve got the first tile panel up, you’ll notice that the rest of the installation will speed up considerably.
- Continue mounting more tile panels. Always be mindful of any cutouts and measure the panels for an optimal fit. You should also ensure the pre-made grout lines are always lined up wherever the tiles meet. To test whether the tile placement and cuts are appropriate, measure and cut a piece of cardboard and put it up to the wall. Then cut the tile panels according to the cardboard measurements. Don’t forget to check whether each tile panel is level.
- Put up tile edging to cover up any unsightly edges. Sometimes, this won’t be necessary, but it’s an option, nonetheless.
- Grout the area. You can grout the tile immediately with non-sanded or unsanded grout. You don’t have to wait for the adhesive to set. The grouting process will be identical to that of ceramic tile.
To see the installation process for yourself, watch this YouTube demonstration.
This information is for a typical backsplash installation. Though, you can use it to install Six3Tile on any flat vertical surface. If you have any additional questions or concerns, view our resources, browse frequently asked questions, or reach out to us directly. When you get the tile panels up and grouted, you’ll quickly realize that you’ve found an outstanding ceramic tile alternative, and you’ll never want to go back to traditional ceramic tile installs!

sm.jpg)
sm.jpg)