-R(150px).jpg?width=100&height=100&name=Six3_box(red)-R(150px).jpg "logo")
Traditional tile installations are known to be time-consuming, labor-intensive, and expensive. And these negatives are amplified for professionals and contractors completing multi-family apartment renovations. If you’re looking for a way to reduce your costs and free up time for other tasks, consider Six3Tile’s tile wall panels. In this blog, we’ll share their benefits and specifications, and how to install them step by step.
Six3Tile’s Tile Wall Panels: The Leading Alternative to Ceramic Tile
Our patented tile wall panels are sheets of integrated tiles that mimic the appearance of ceramic tile. Not only are they indistinguishable from ceramic tile, but they offer several benefits over them. These include:
- Easier Installation. Installing ceramic tile takes expertise, skill, and specialized tools; our tile wall panels do not. To install our no-fuss panels, all you’ll need are:
- An instrument to make cuts (like a utility knife, rotary cutter, or circular saw)
- Construction adhesive or Type-1 mastic for mounting
- Quicker installs. Our tile wall panels can be installed over existing tile, drywall, or cement backer boards. There’s no need to prep the surface. Workers also won’t have to lay tiles one by one - they’ll lay panels of tiles, saving considerable time and effort.
To put things in perspective, a tiling job that would have taken several days will only take about an hour with our tile wall panels.
Tile Wall Panel Kits For All Your Multi-family Apartment Renovations
Our customers use our tile panels for several areas of their multi-family apartment construction projects, including kitchen backsplashes, and shower & tub surrounds. Our tile wall kits are tailored to each of those areas. Keep reading to learn more.
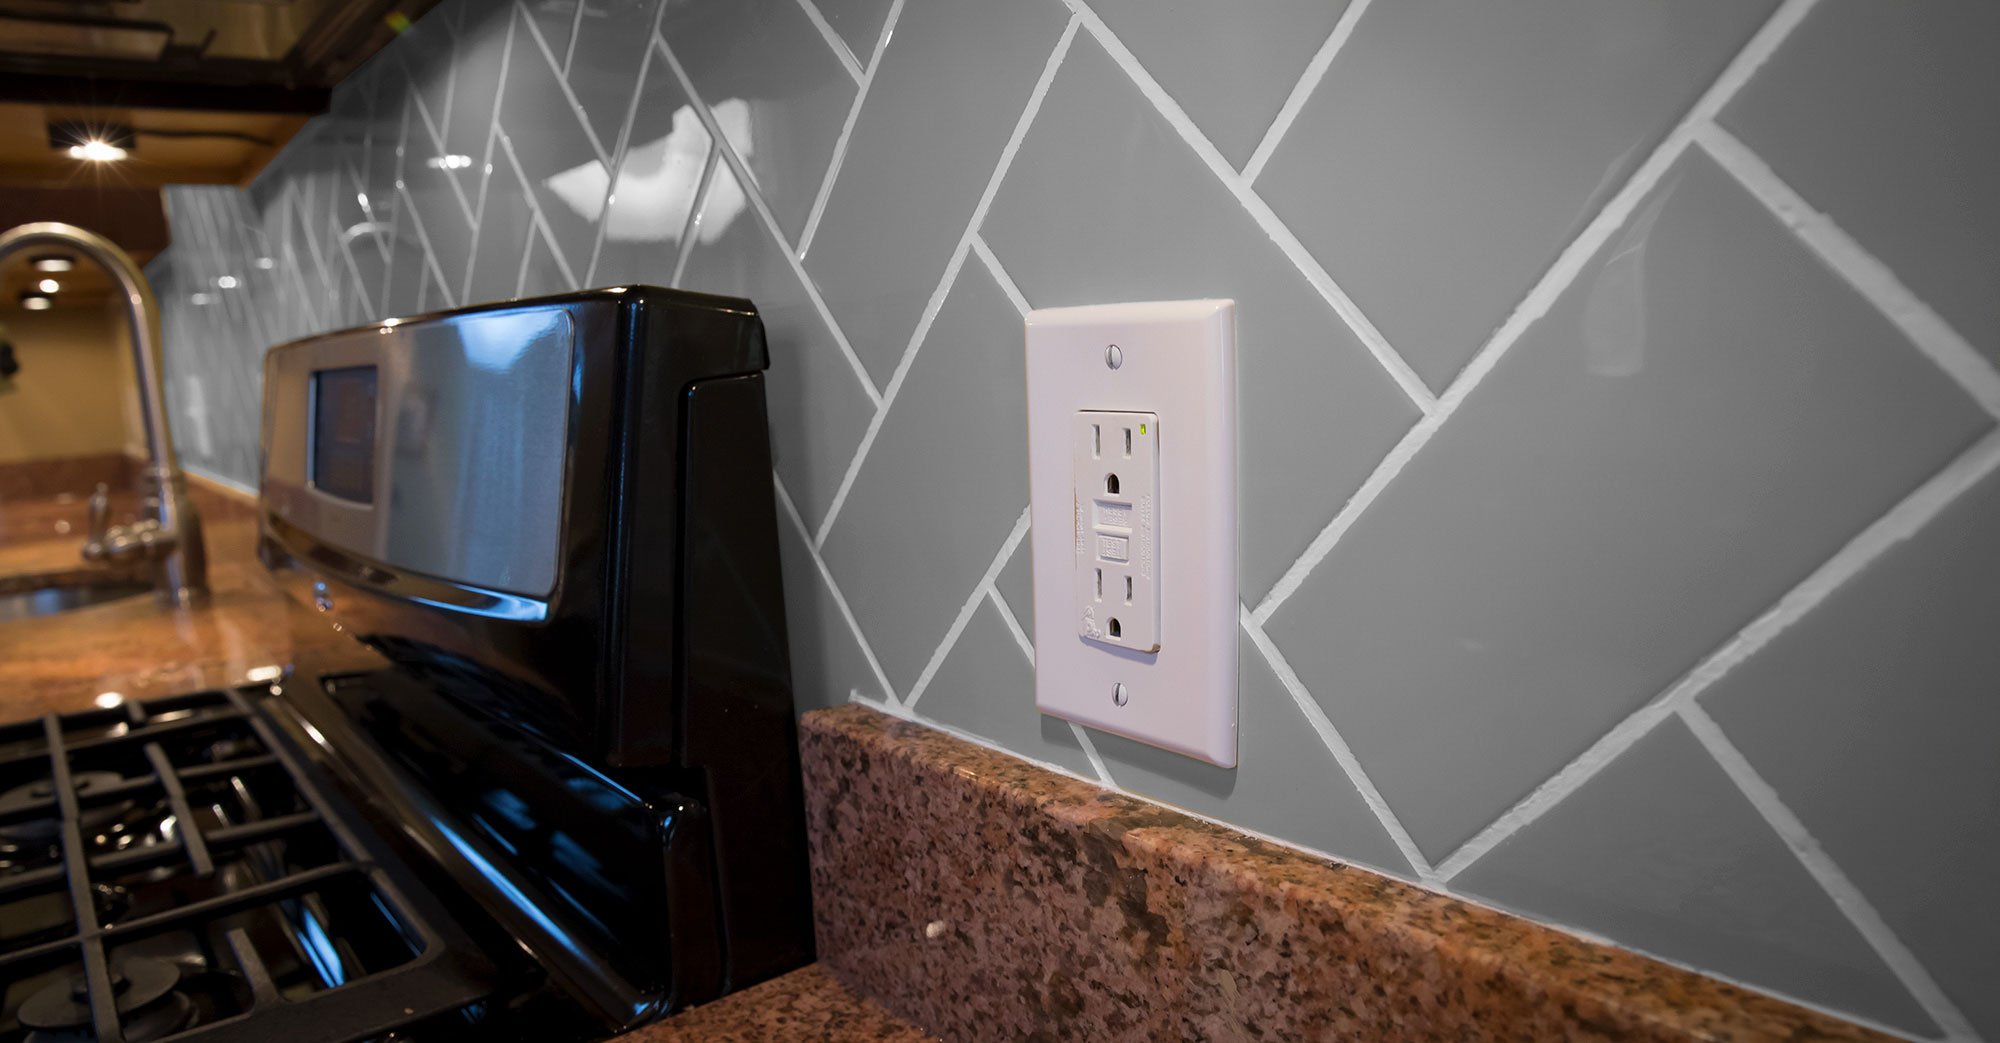
Backsplash Pro Kits - 5-piece
Does your multi-family unit need kitchen upgrades? Then, our kitchen backsplash pro kits are the perfect fit. Each kit comes with 5 Six3Tile panels. See below for the dimensions:
- 6 square feet of coverage per sheet.
- 30 square feet of coverage per kit.
- Each sheet is 19” high, 47” wide, and ¼” thick.
Get yours in one or more of the following colors:
- White (Equivalent to Sherwin Williams High Reflective White)
- Passive Gray (Equivalent to Sherwin Williams Passive)
- Software Gray (Equivalent to Sherwin Williams Software)
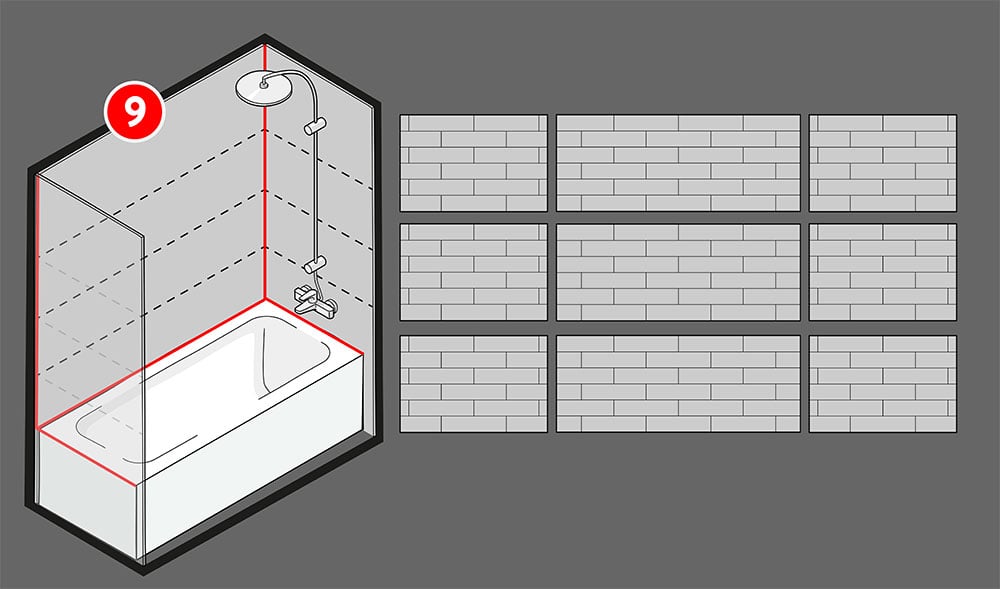
Tub Surround Pro Kits - 9 Sheets
Looking for tub inserts that look like tile? Our water-tight tub surround kits are exactly what you need. Each kit includes 9 bathroom tile sheets with the below dimensions and coverage:
- 6 side pieces and 3 back pieces:
- Side piece dimensions (6 pieces): 24” high, 36” wide and ¼” thick
- Back piece dimensions (3 pieces): 24” high, 60” wide and ¼” thick
- 64 square feet of tile.
- Covers 36” x 60” x 72”
These kits are available in a gloss or matte finish with three colors to choose from; White, Passive Gray (SW 7064), and Software Gray (SW 7074).
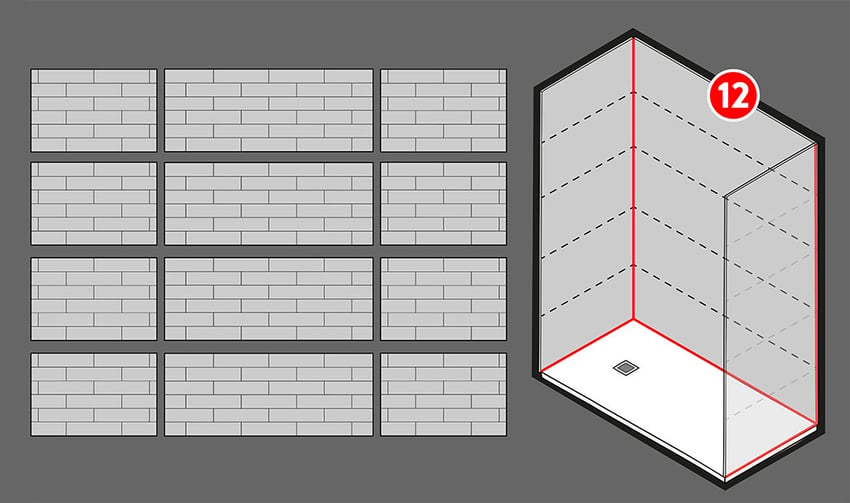
Shower Surround Pro Kits - 12 sheets
For full showers, consider our water-tight shower surround kits. Each kit comes with 12 bathroom tile sheets. See the below list for some dimension specifications:
- 8 side pieces and 4 back pieces:
- Side piece dimensions (8 pieces) - 36” wide, 24” tall, and ¼” thick
- Back piece dimensions (4 pieces) - 60” wide, 24” tall, and ¼” thick
- 84 square feet of tile.
- Covers 36” x 60” x 96”
These kits are available in a gloss or matte finish with three colors to choose from; White, Passive Gray (SW 7064) and Software Gray (SW 7074).
Six3Tile Installation Process
Regardless of which kit(s) you decide on, the basic installation process remains the same. To see the process for yourself, watch this instructional video for kitchen backsplashes or this video for tub and shower surrounds. For a quick step-by-step explanation of how to put up the panels, see the below instructions:
- Take your measurements and cut the tile sheets to fit the space you’d like to remodel. To cut the perimeter of the tiles, use either a utility knife, rotary cutter, oscillating saw, or circular saw. To create access holes for light switches, pipes, and outlets, you would use the same tool set.
- Adhere the tiles to the surface. Apply construction adhesive or type-1 mastic to the underside of the tile sheet and press it onto the surface. When placing multiple sheets beside each other, use ⅛” spacers on the joints for uniformity and perfect grout lines. All standard Six3Tile products have a ⅛” grout line.
- Grout and finish the tile edges. Unsanded or nonsanded grout is appropriate for these tile panels. We recommend typical Schluter-type edging for exposed edges.
- You’re all done!
Six3Tile products are sure to revolutionize your tile installation process, saving you time and money as you wow your tenants and clients. If you have any questions about Six3Tile products, see our Frequently Asked Questions page or view our resources. You can also contact us directly here. Happy tiling!

.jpg)
sm.jpg)
sm.jpg)